
|
Welcome to the final Tool of the Month blog post for 2017! This month it's a very quick look at a tool that’s always in the pocket of my work jeans! 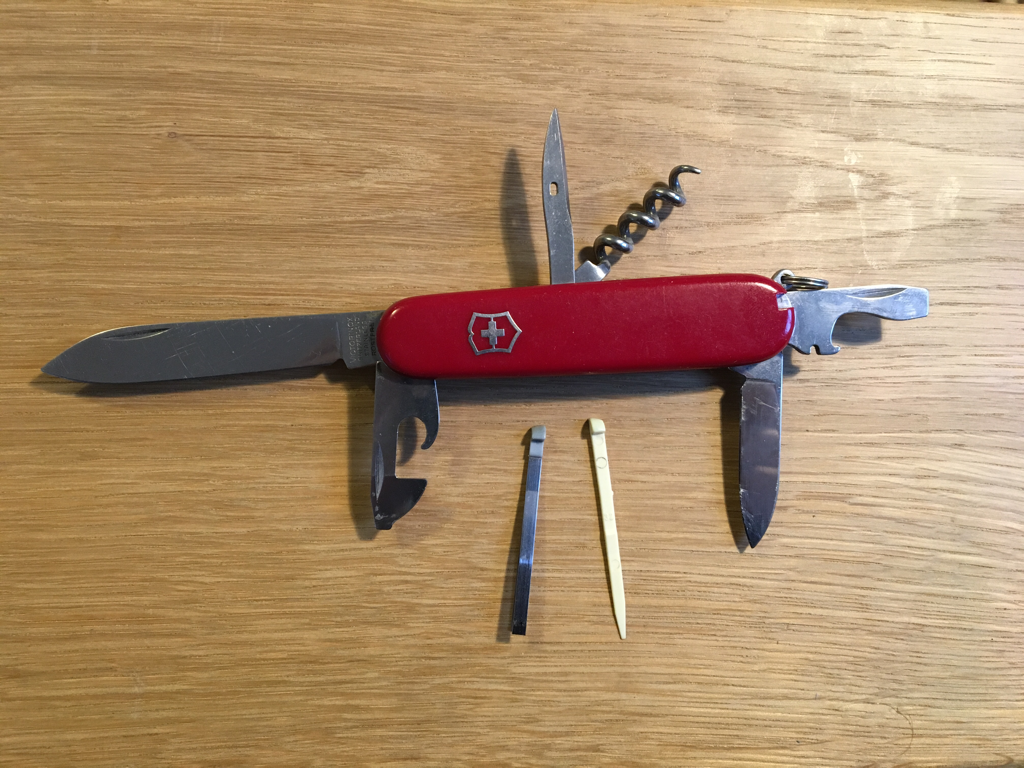 The knife showing all the different tools. In the 1890’s the Swiss army adopted a new pocket knife, this knife contained a blade, can opener and a screwdriver for stripping and reassembling the army’s rifle. This would become the original Swiss Army knife, today there are many versions with countless combinations of tools, some useful some simply as a gimmick! The knife that lives in my pocket at work is the Spartan model made by Victorinox, it is one of the most basic versions made. It has two blades, screwdrivers, bottle opener, corkscrew, punch, toothpick and tweezers. 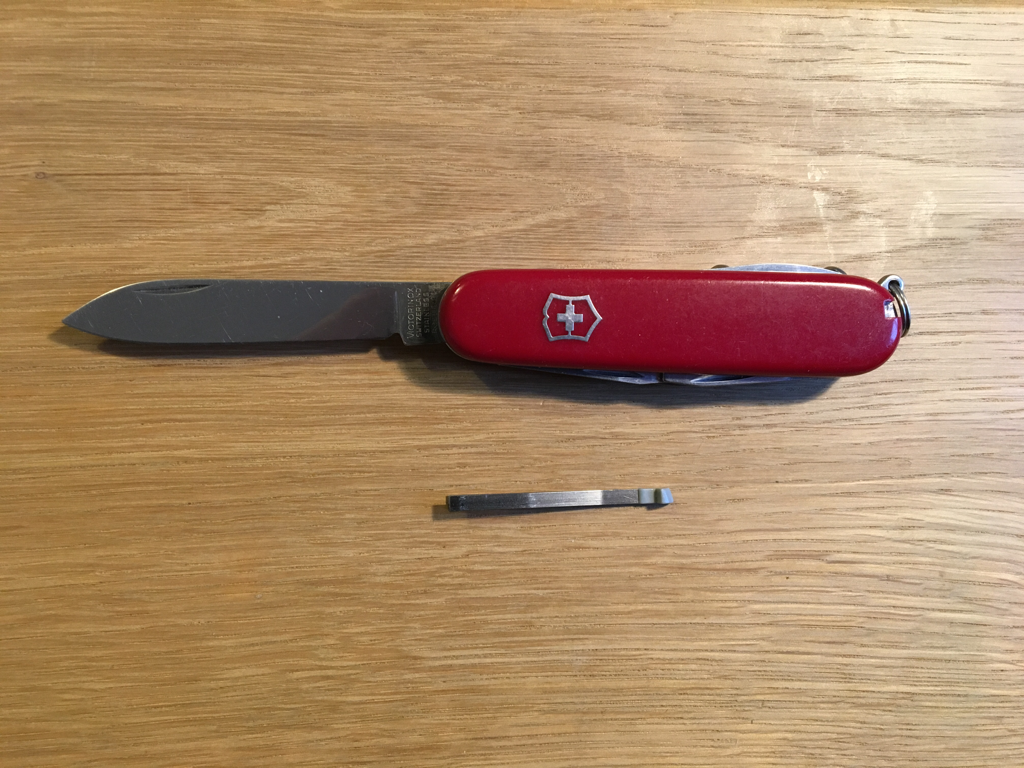 The same knife showing the two tools I use the most! The two most used functions are the main blade for opening boxes and sharpening pencils and the tweezers which are brilliant for removing splinters!
That’s it for this months blog and 2017! Happy New Year 🎊
0 Comments
Welcome to November’s Tool of the Month blog post, this month it’s a quick look at the rebate block plane! 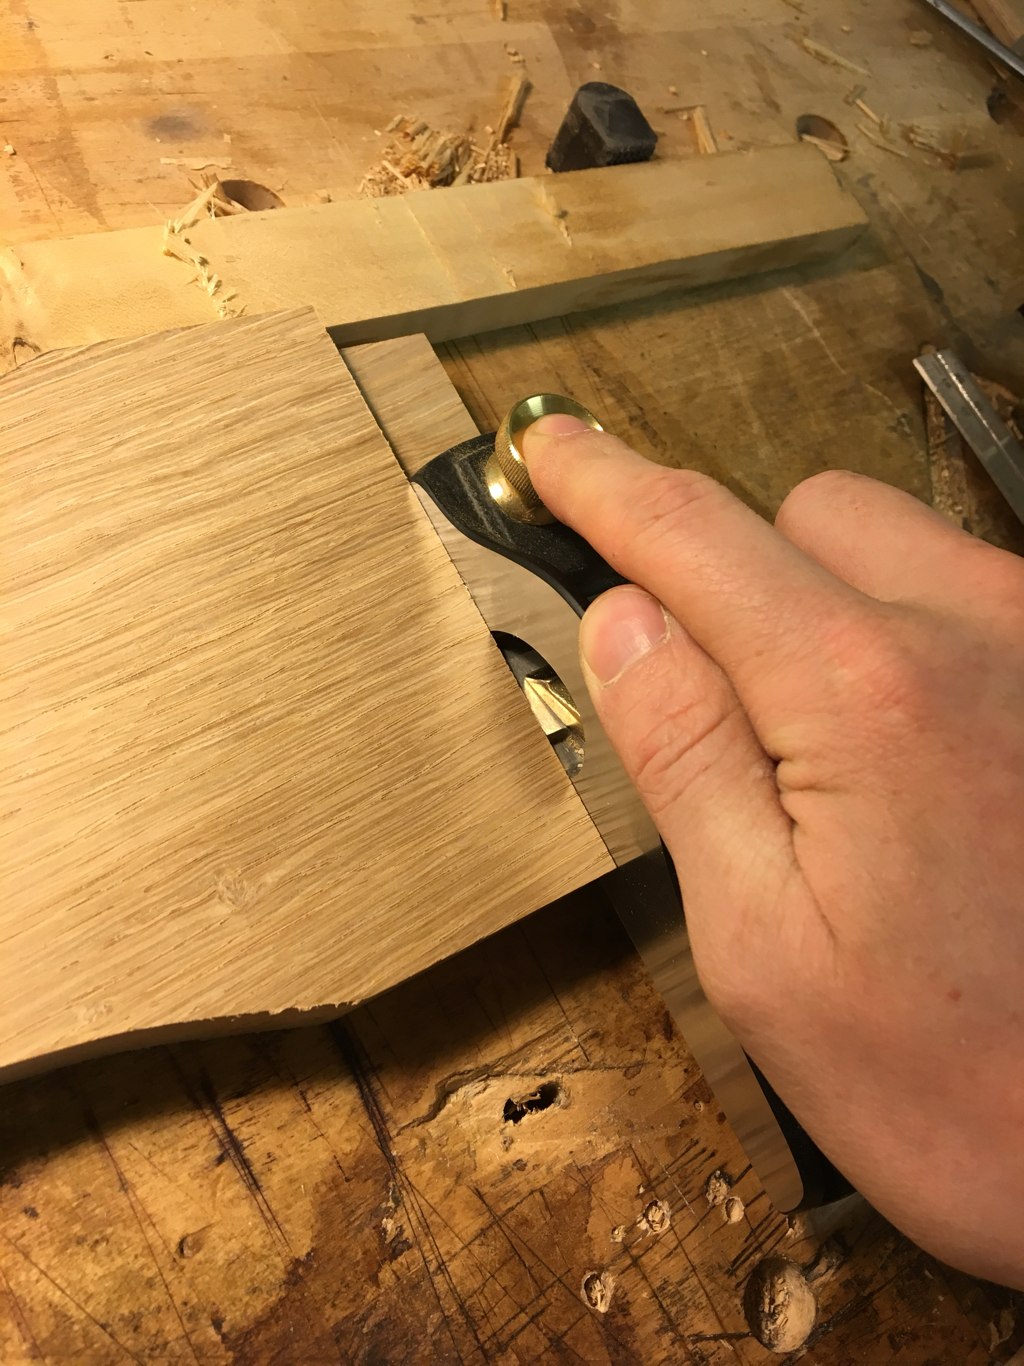 Low angle rebate block plane being used to skim an oak tenon The rebate block plane is a combination of block plane and shoulder plane. It is basically a regular low angle block plane with a fixed mouth and open sides allowing for a wider blade that extends the full width of the body, just like a shoulder plane (see December 2016’s blog post). This is a very handy tool for cleaning up raised and fielded panels and large tenons as the width of the tool makes skimming wide surfaces quick and easy. For working across the grain this particular model has two little cutting discs called ‘nickers’ recessed into the sides of the plane, these can be set to score the surface before the blade cuts which helps prevent splintering! 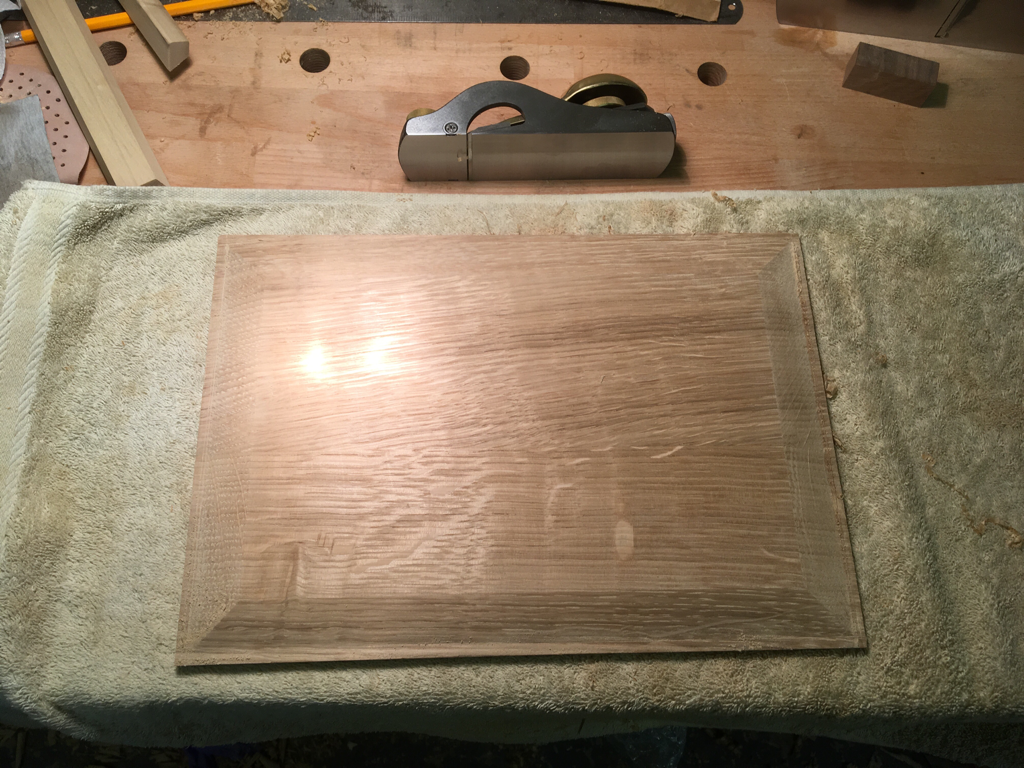 Low angle rebate block plane with an raised and fielded panel. 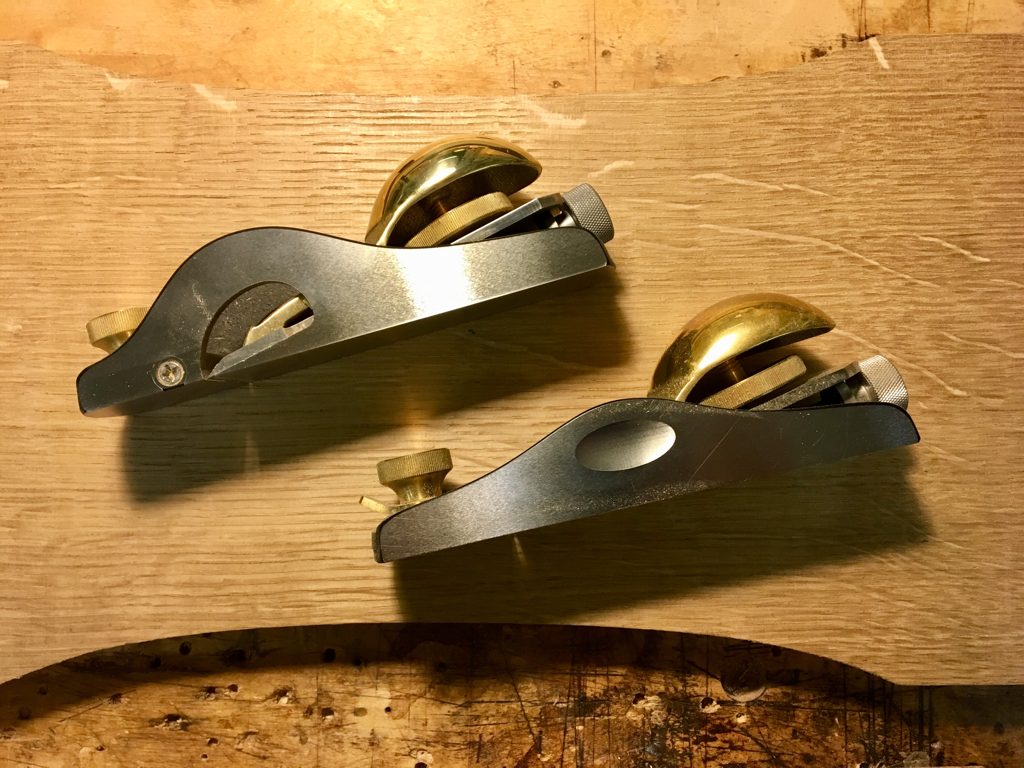 Low angle rebate block plane alongside a normal low angle block plane. My plane was made by Lie Nielsen in the USA, other similar planes are available from Veritas and Quangsheng.
One thing that you have to be mindful of with these planes is that due to the open sides the tool can flex if the blade is tightened down to much, so careful setting is a must for accurate work! Thats all for November, look out for December’s Tool of the Month post! Welcome to October's Tool of the Month blog post! This month I'll look at socket bevel edged chisels!  David’s set of Lie Nielsen socket chisels. The socket chisel is not a particularly common type of chisel these days due to the more complex design and therefore cost when compared to the more common tang chisels. 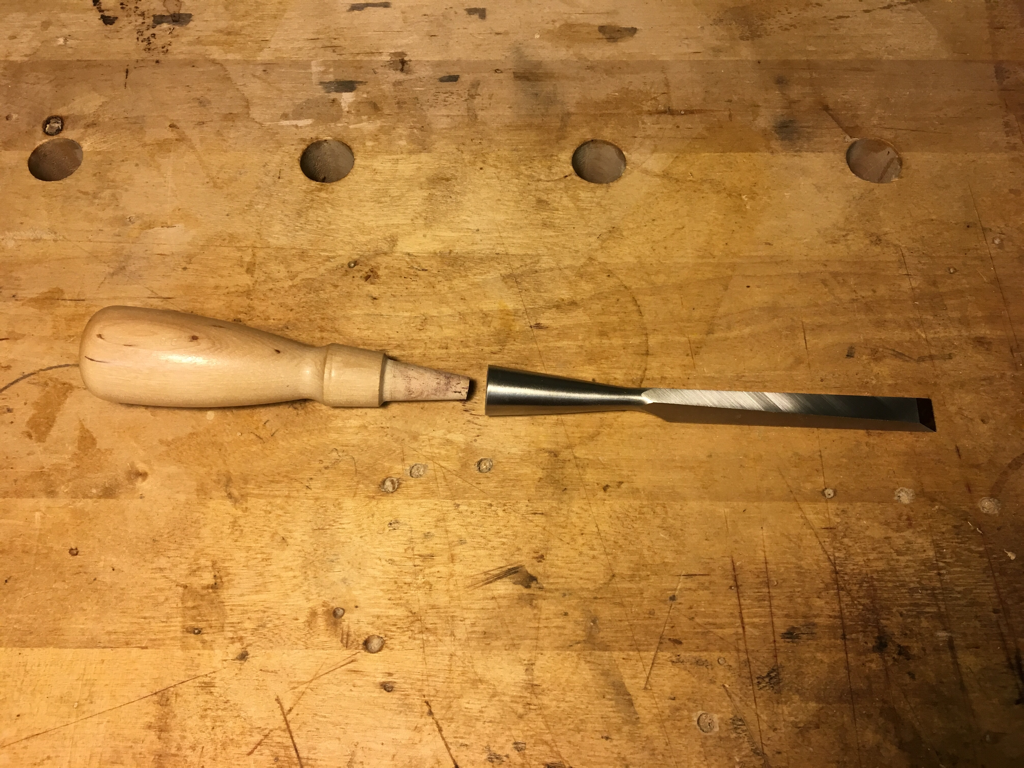 Socket chisel with the handle removed to show how it fits. The difference between tang and socket chisels is how the handle is attached to the blade. A tang chisel has a pointed metal tang formed on the opposite end of the blade, this is embedded into the handle, whereas a socket chisel handle has a cone shaped end that fits snugly inside the socket formed on the opposite end of the blade. The disadvantage of a tang chisel is that the pointed tang can act like a wedge and split the handle when repeatedly struck excessively with a mallet, this doesn’t happen with the socket chisels. Though occasionally the handles on socket chisels can come loose due to the wood shrinking as part of natural seasonal movement, however a sharp tap and they will be tight again! 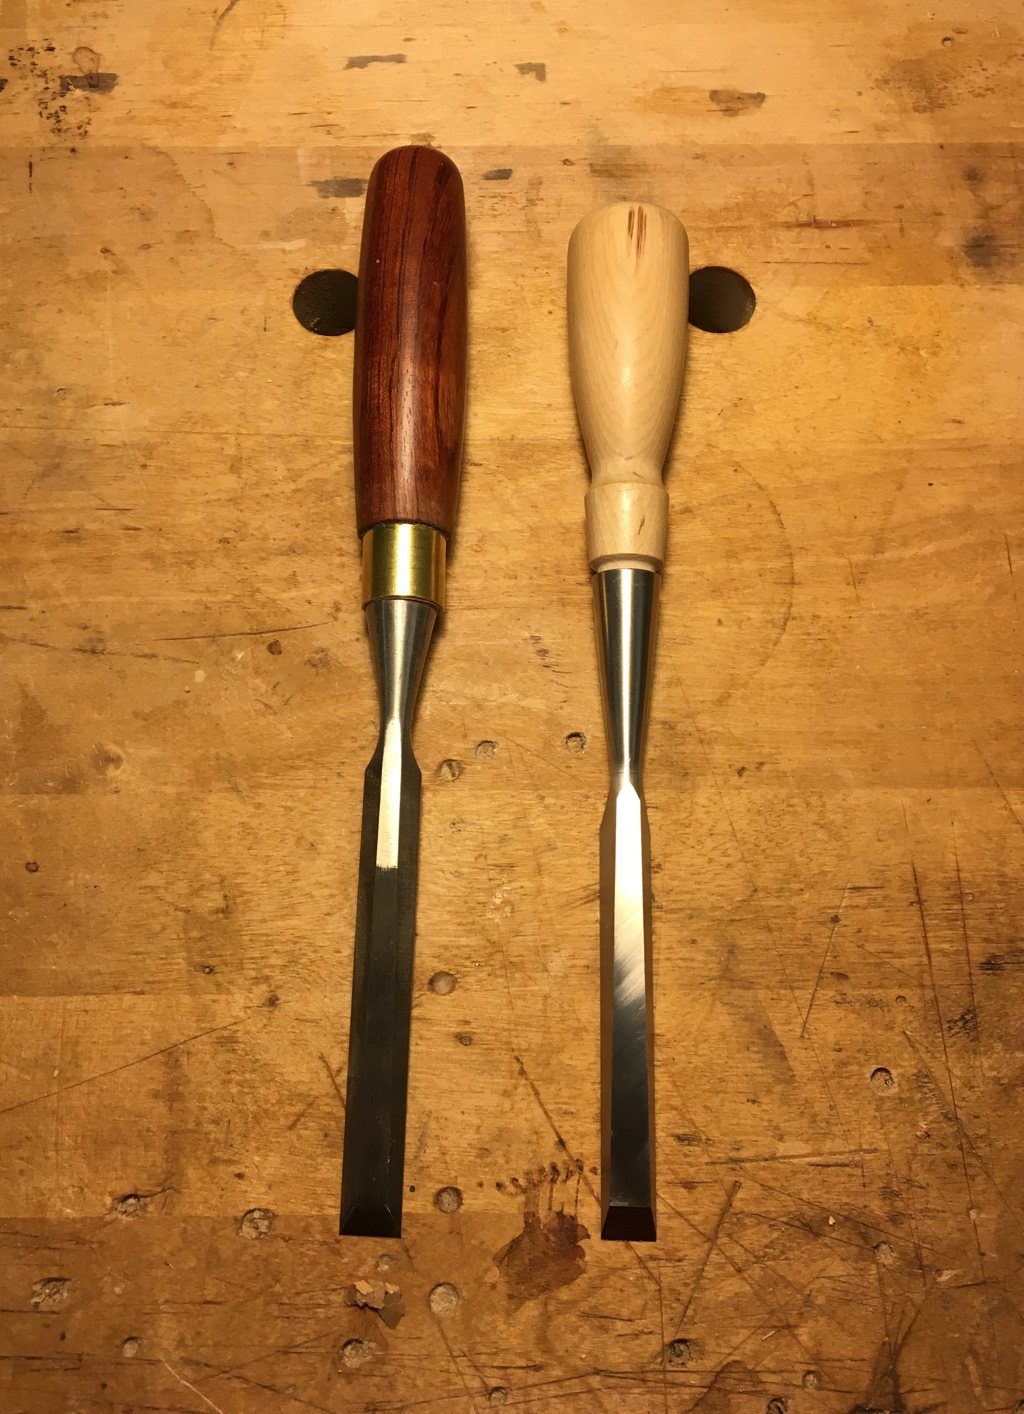 Lie Nielsen socket chisel next to a tang chisel by Ashley Iles My socket chisels are made by American company Lie Nielsen Tool-Works and are based on an old Stanley design. The blades are made from A2 steel which takes and holds a good edge. The sides of the blades are very finely ground which make them brilliant for working on very fine joints.
That’s all for October, look out for November’s blog post in a few weeks time. Happy Halloween 🎃 Welcome to September's Tool of the Month blog post, this month I'll look at the Plane Screwdriver. 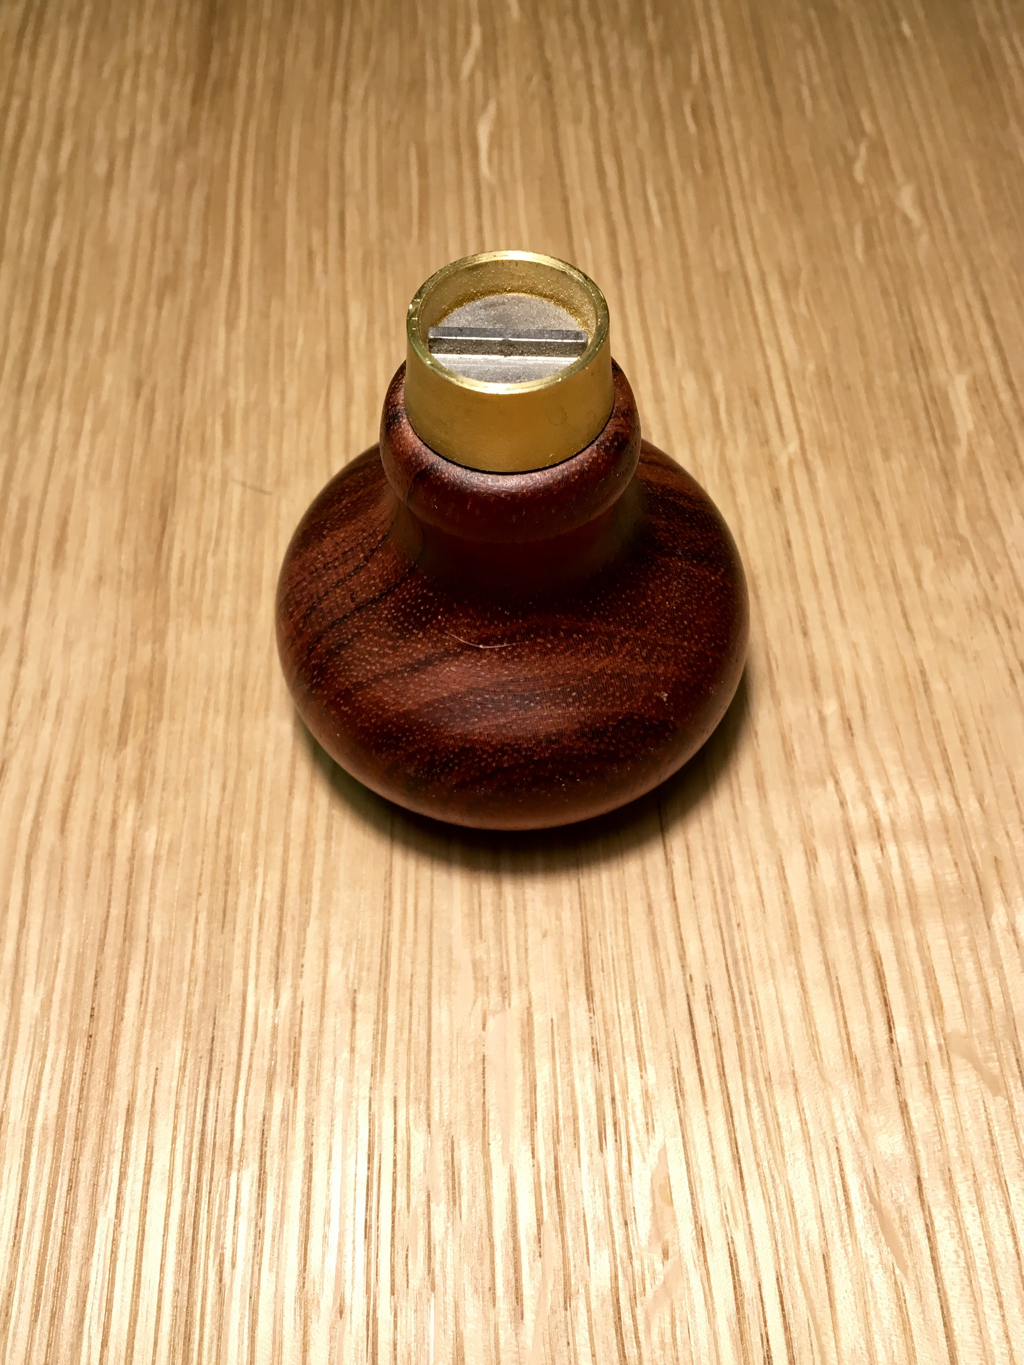 The plane screwdriver. The plane screwdriver is a very simple tool, but very handy! It's designed for tightening/loosening or adjusting the large slotted screw that fixes the cap iron to the blade of a traditional hand plane. Normal screwdrivers that perfectly fit the slot in the screw head tend to be pretty large and unwieldy, whereas a narrower screwdriver can slip around and damage the screw slot, which isn't ideal! This chunky little tool fits perfectly plus it's very comfortable to use and is well worth the £10-£15 price tag! 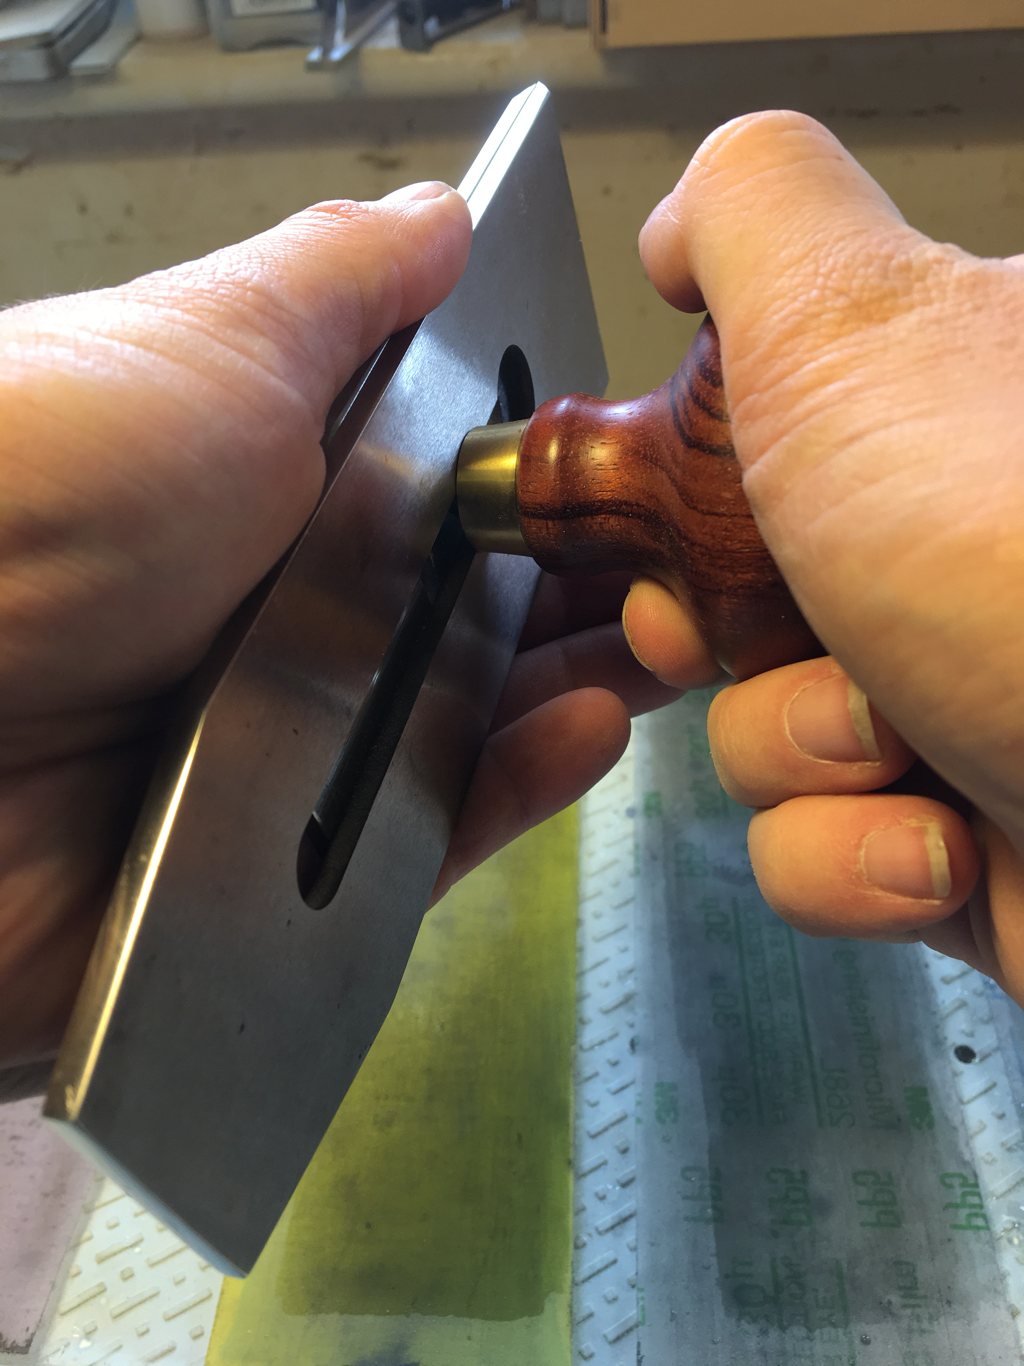 Plane screwdriver in use tightening the cap iron. Thats all there is to say about this particular tool, so to finish September's blog here's a photo of the large job I've been working on this month... 12 oak benches for the Greenwich Steiner School in London. At some point there will be a blog post all about the bench project! That's all for September, look out for October's Tool of the Month post! 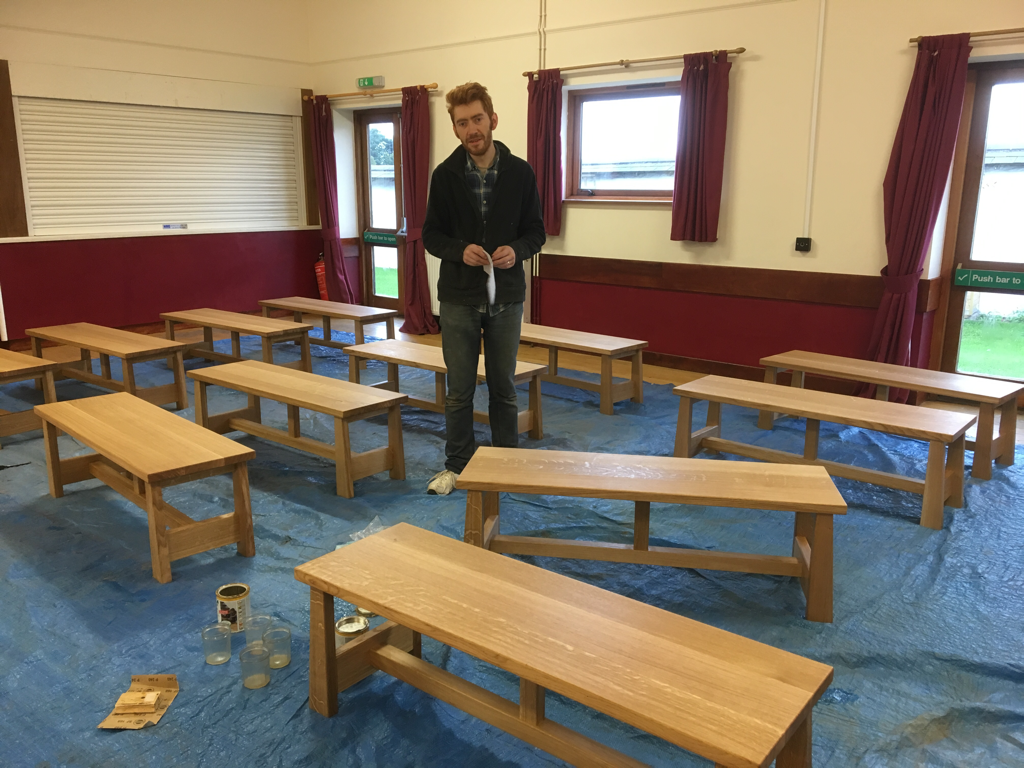 12 freshly oiled oak benches for the Greenwich Steiner School. Welcome to August's Tool of the Month blog post! This month I'll take a little look at the No. 66 beading tool. 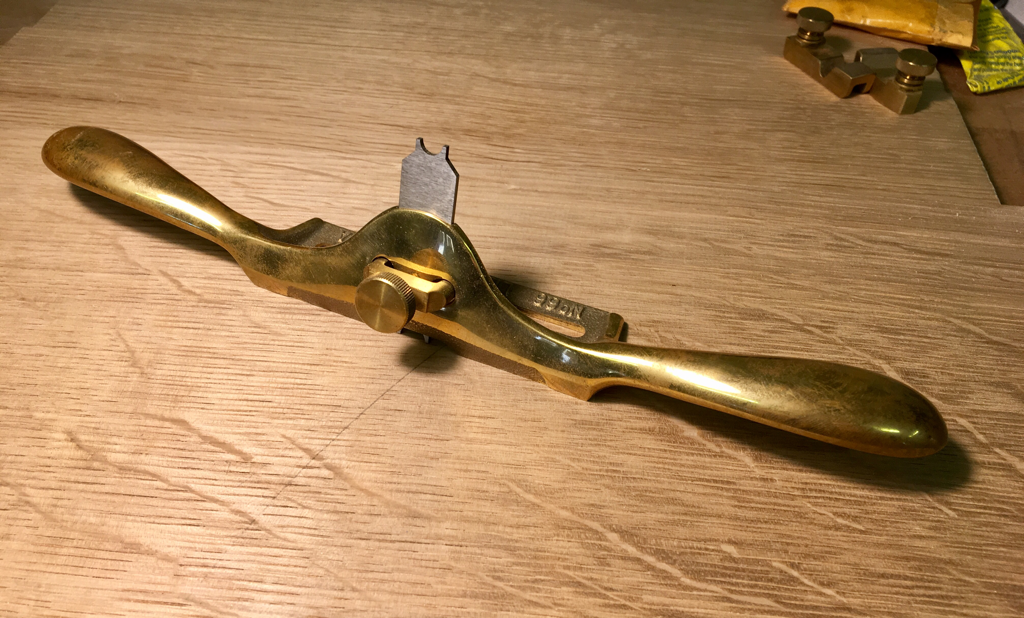 Lie Nielsen no 66 beading tool The beading tool is to an extent obsolete these days as virtually all the tasks it can do can now be done with an electric router. However this tool is far less dangerous and a lot quieter... plus in some circumstances faster and more convenient! This is a modern copy of an old Stanley beading tool which was made from the 1880's until the 1940's. This version unlike the original is made from bronze so it has a nice heft to it! The tool is designed to produce small moldings using the supplied selection of profiles or those made yourself. 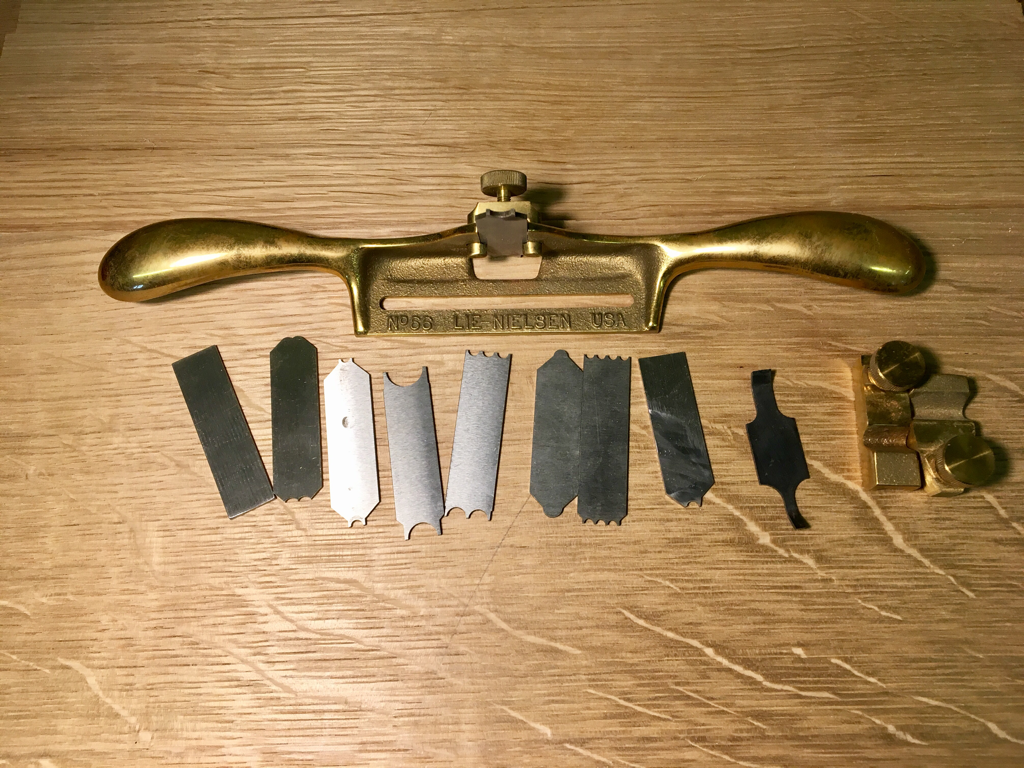 No 66 beading tool with profiles and fences. The tool works by scratching the profile into the timber, it is pretty easy to get to grips with and if you only need to produce a small amount of molding/detail then it can be a lot faster than setting up a router. To use the tool simply select a profile, set the depth and choose a fence, straight for following straight edges or curved for curved edges. Then using short strokes to begin the profile, start to work along the lengh of timber being careful to go with the grain! Overlapping each stroke over the previous one and keep the tool firmly against the edge of the workpiece.  David using the beading tool to produce a rounded profile. Custom profiles can also be produced by using some suitable sized steel and some metal files, the photo below shows a custom profile I made 5/6 years ago to add a very fine detail to the legs of some tables.  Custom made beading tool blade. Thats all for August, I'm beginning to get stuck in to making a batch of 12 oak benches for a school in Greenwich so in next months blog there will be a photo of the finished job. Look out for September's Tool of the Month post in a few weeks! 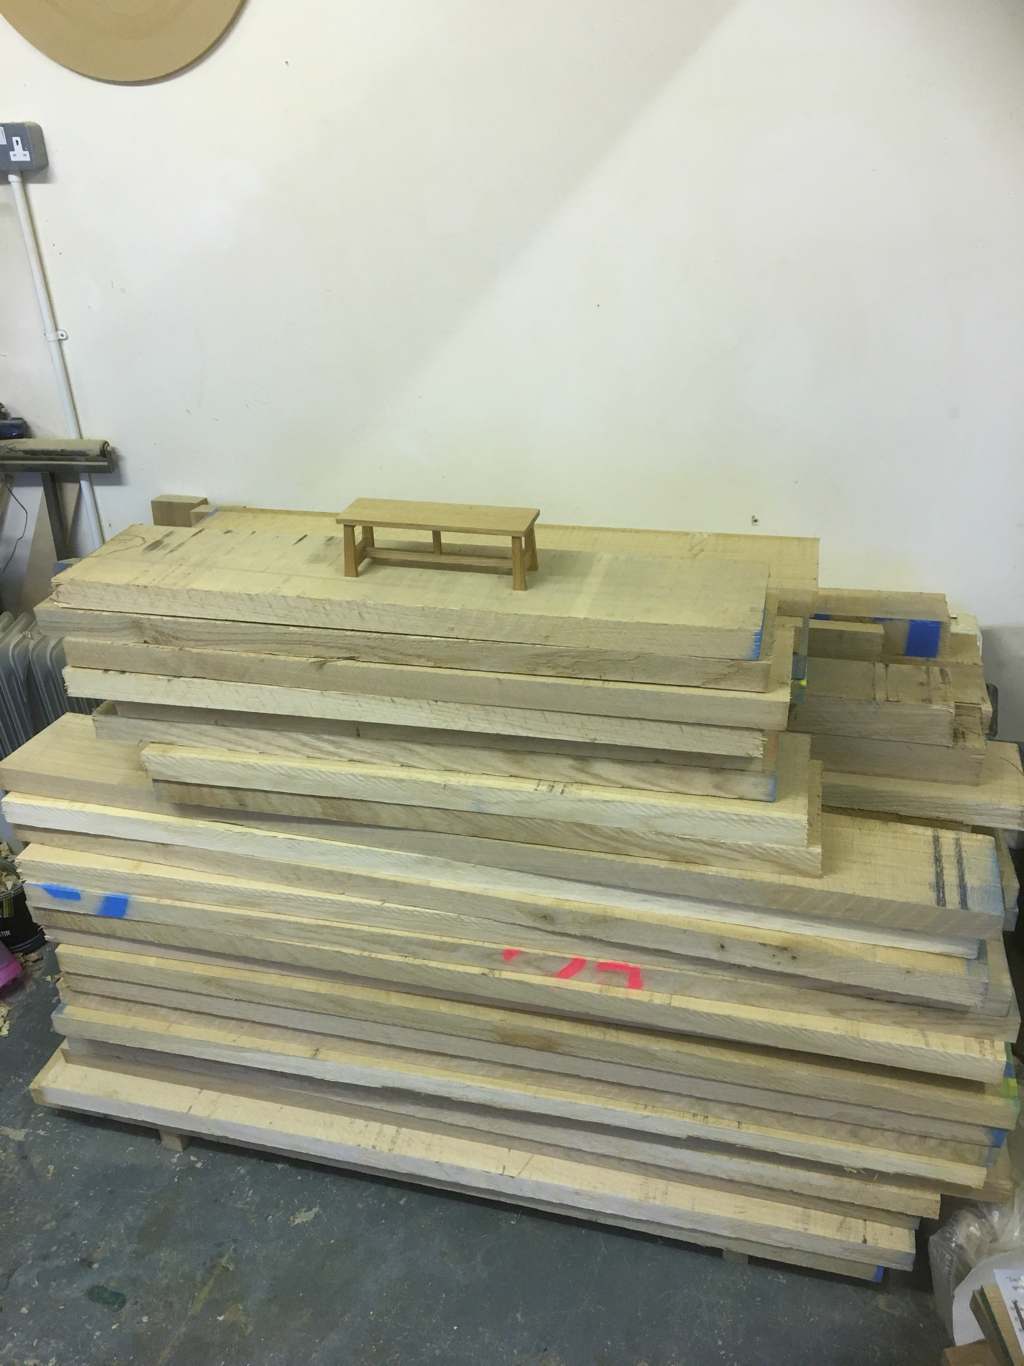 A very large pile of oak soon to become 12 oak benches for the Greenwich Steiner School in London! Welcome to July's Tool of the Month blog post! This month I'll take a quick look at the joinery float! 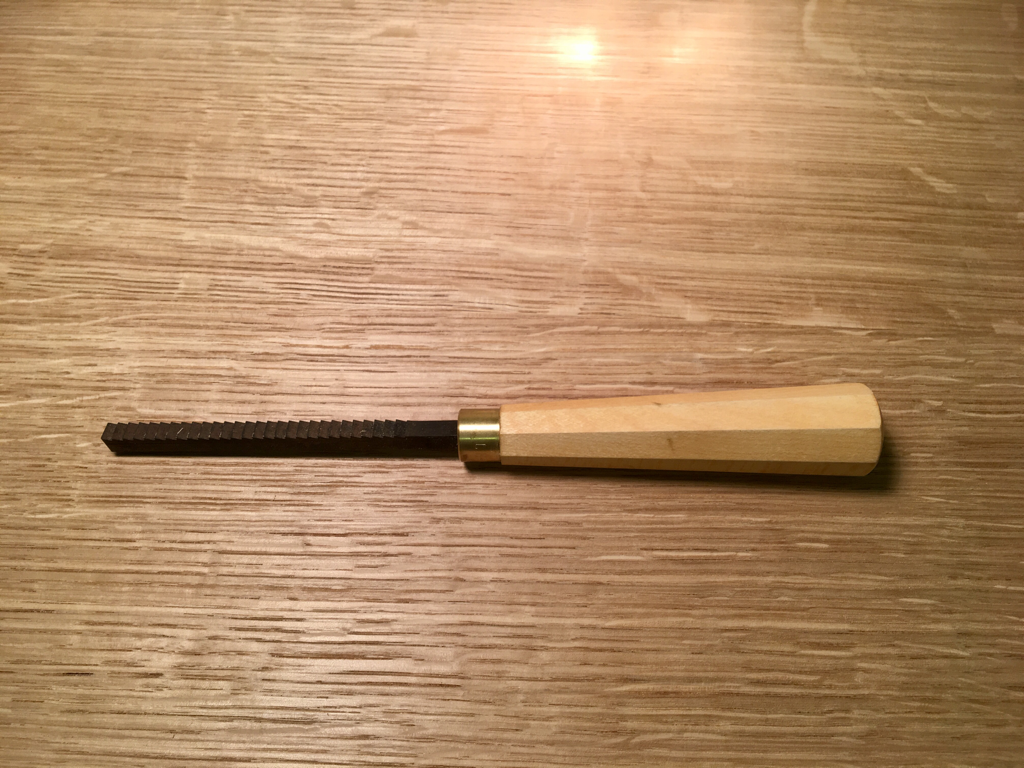 The joinery float! So what is a joinery float? Well basically it's a type of file designed for cutting wood, used to clean up and adjust the insides of mortises, and that's about it really! 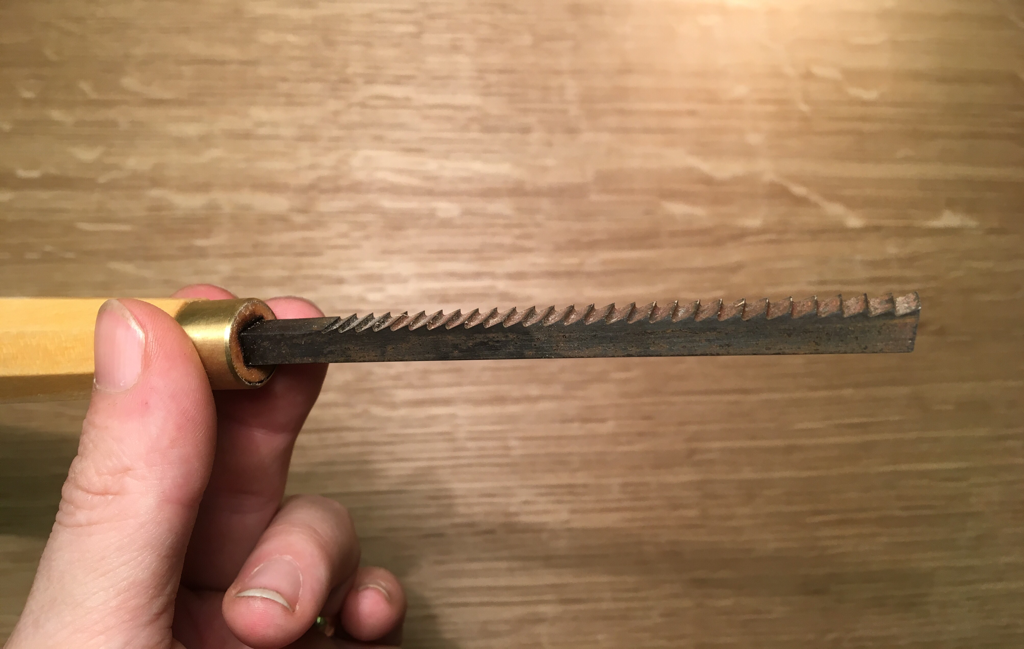 Showing the teeth. The float has teeth angled to cut in one direction only, they can be resharpened very easily with a fine metal file. I use mine to square up and tweak the ends of mortises, which tend to be a bit more awkward to adjust with a chisel (which will try and follow the grain).
There are wider floats available which can be used to adjust the sides of mortises and can be used to flatten the faces of tenons too. Plane makers floats are another type available, these are used to produce wooden hand planes, particularly handy for shaping the mortice in the body where the blade sits. That's it for July, it's been another very busy month of catching up in the workshop, August is looking to be even busier! Look out for next months blog post coming soon. Welcome to the June edition of Tool of the Month! This month it's a little look at a special type of chisel called a fishtail chisel. 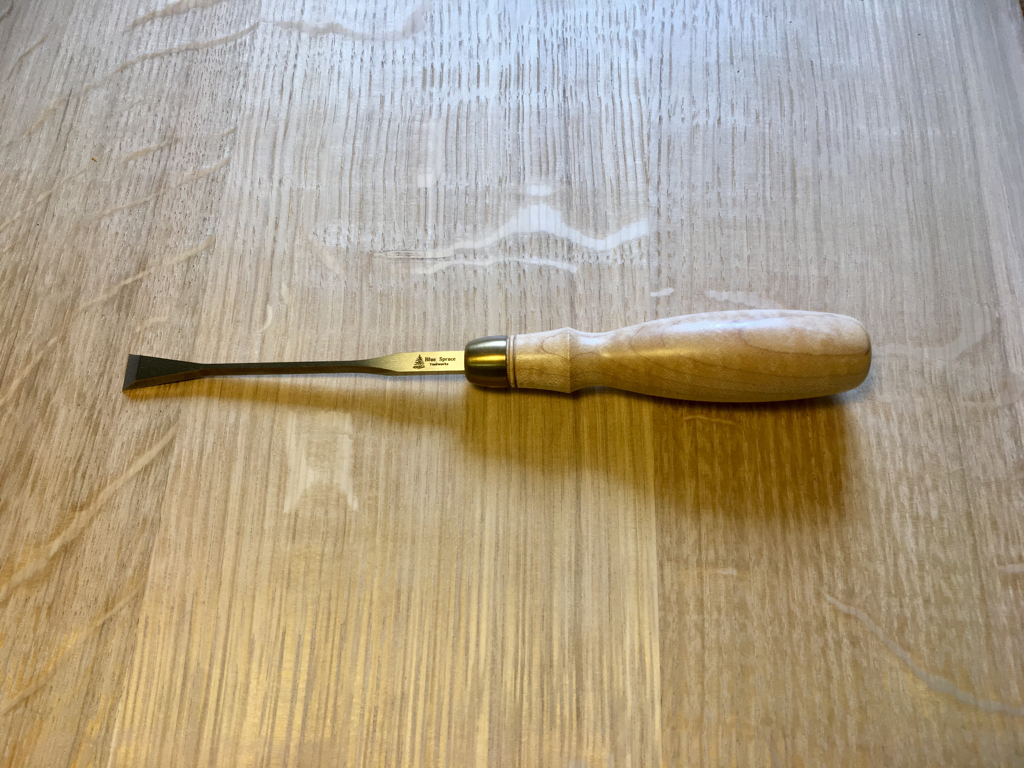 The fishtail chisel has a fishtail shaped blade (hence the name) that is designed to get into the corners of half-bind/lapped dovetail sockets. These are areas which normal chisels can't reach easily, which can result in a less than perfect joint fit. 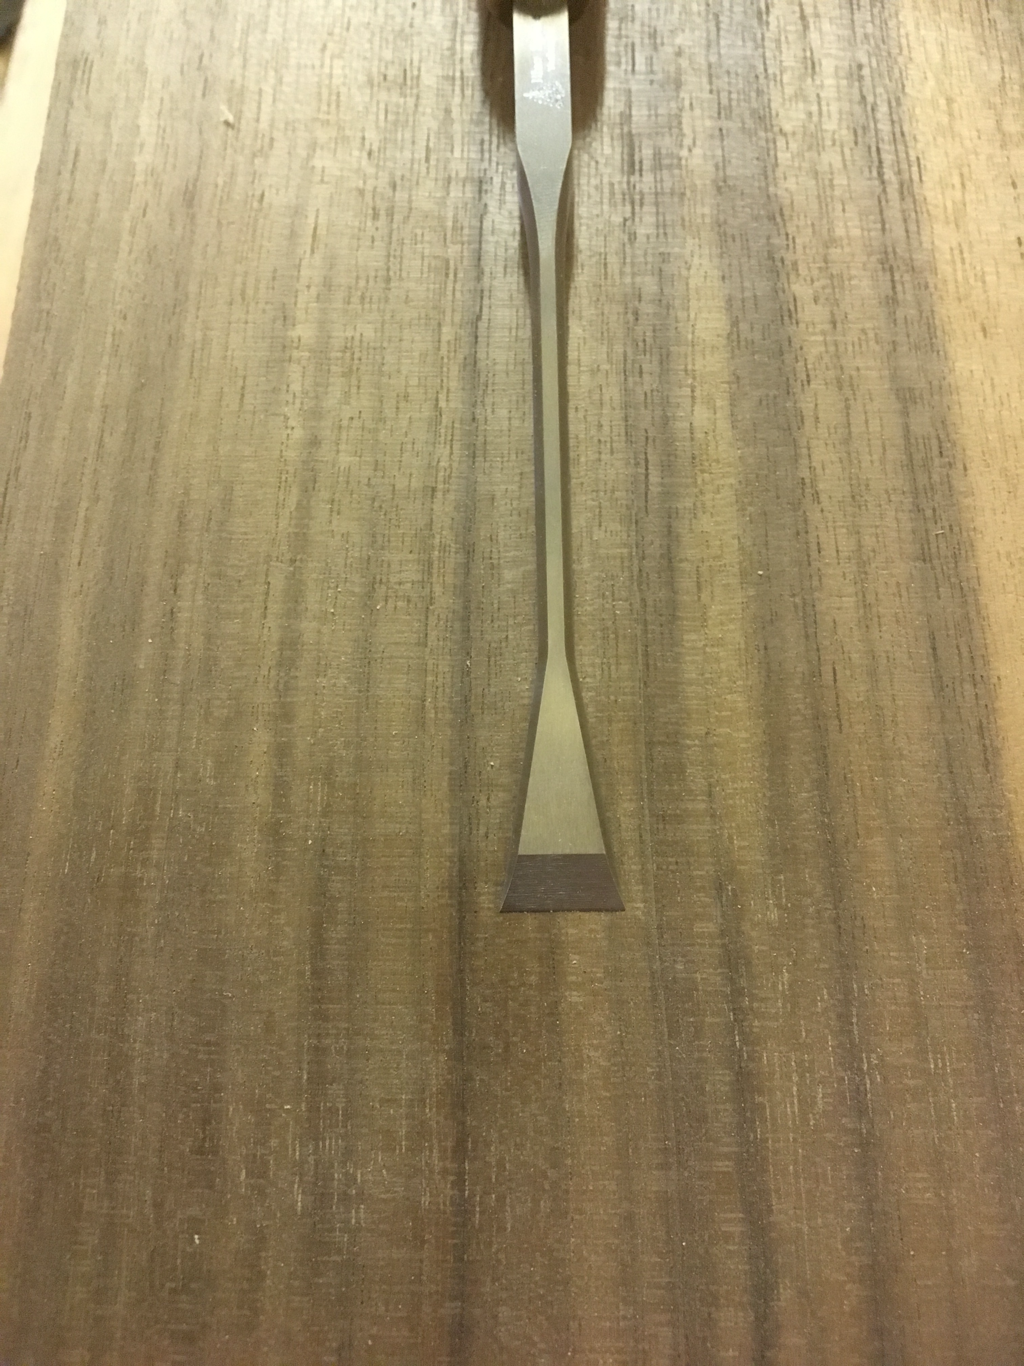 My chisel was made in America by Blue Spruce Toolworks, it has a blade made from A2 steel and a curly maple handle.
Another way to reach those tricky corners is to make a skew chisel, this will be covered in a future blog post! That's all for June! Again it's been a busy month, catching up on work after the disruption (the good kind!!) of a house move and wedding. Look out for July's post coming soon. Welcome to a very brief Tool of the Month blog post, this month I'll take a quick look at mechanical pencils! 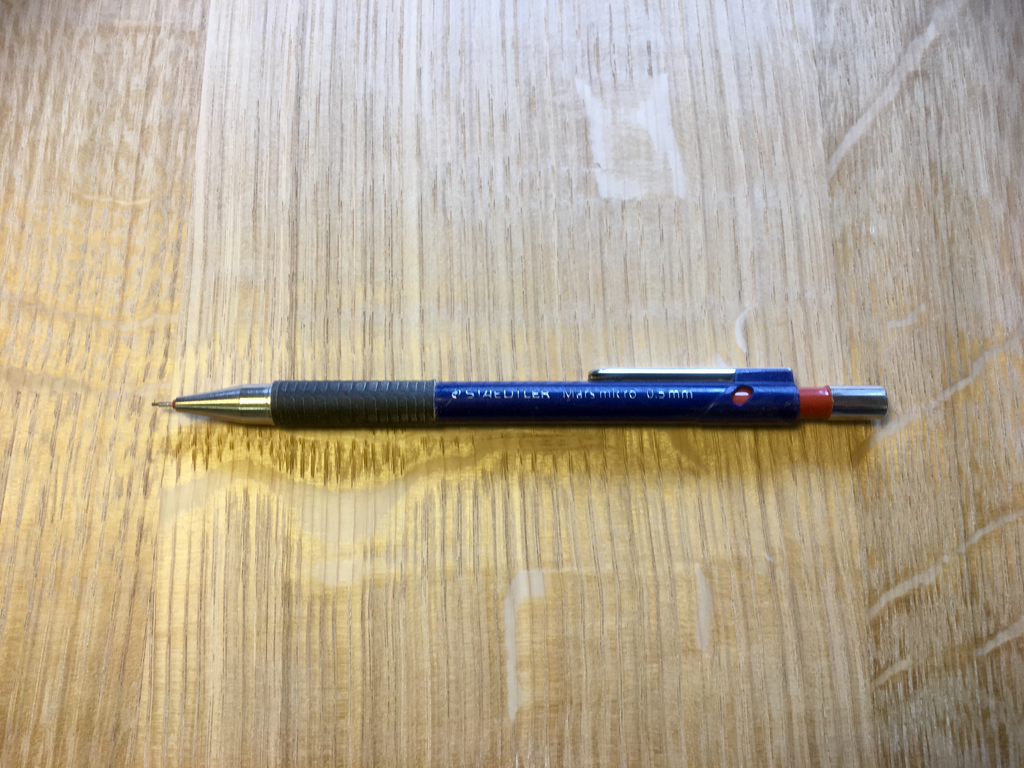 The mechanical pencil was developed to aid technical drawing. Thought to have been Invented in the 18th century and becoming more widespread in the 19th & 20th centuries. The advantage of a mechanical pencil using fixed diameter pencil leads over a standard pencil is that the tip is always the same diameter, this makes marking out and technical drawings far more consistent and repeatable therefore boosting accuracy. That's all for May, this month has been extremely hectic as i have been preparing to get married!  Welcome to the April edition of Tool of the Month! This month I'll take a little look at some marking knives. The marking knife is on the face of things a pretty simple tool, but that's a little deceptive as its role in the workshop is vitally important to creating accurate furniture. 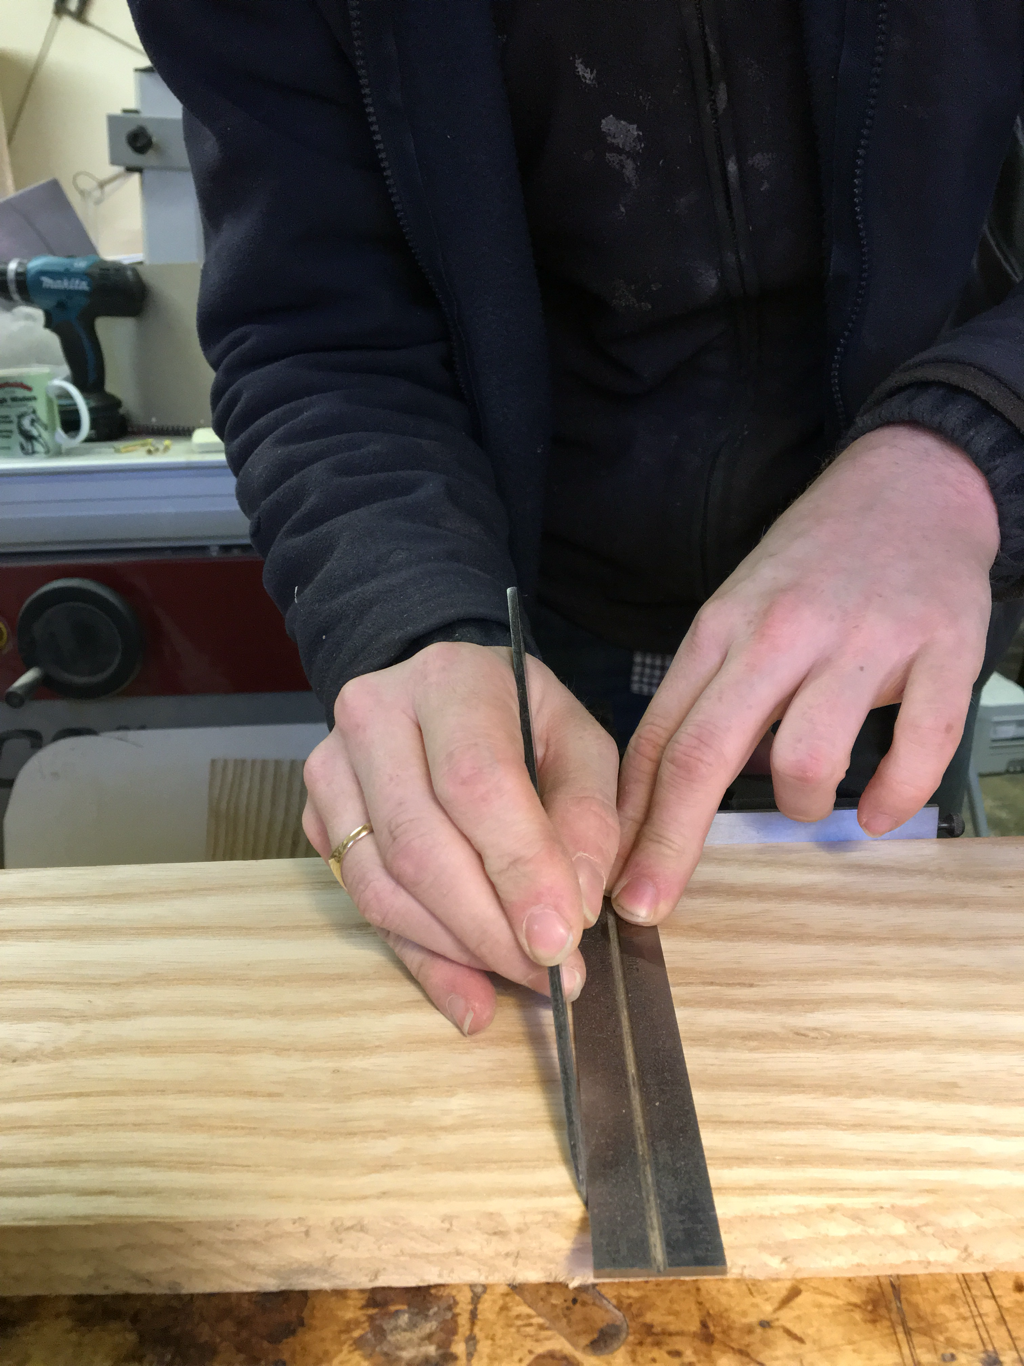 Marking a knife line across the grain of a piece of ash. Marking knives are used to produce a very accurate line (far thinner than a pencil line) which aids in making accurate cuts with other edge tools or machinery. There are two basic types, replaceable bladed knives or re-sharpenable ones. 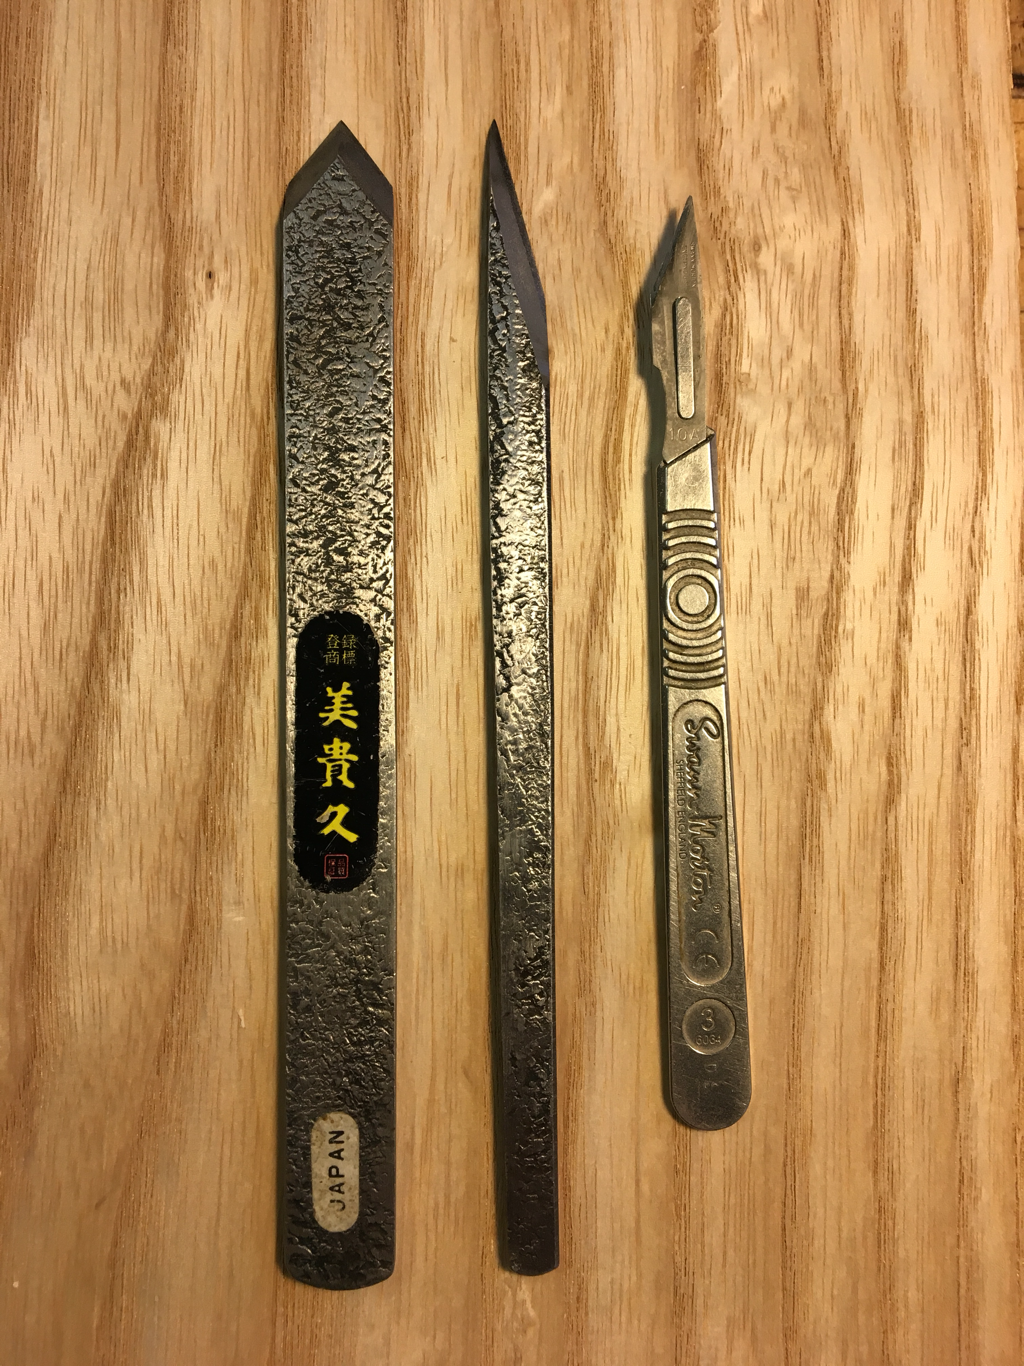 These are the marking knives i use, on the left are two Japanese knives and on the right is a scalpel. The Swann Morton No 3 scalpel uses replaceable blades and is great for day to day marking and cutting, but as the blade has a 'V' cutting edge profile it isn't ideal for marking critical shoulder lines as it allows the chisel to wander in the line. The Japanese knives are all re-sharpenable, and they have a single cutting bevel or a single sided V point double bevel with a flat back. This type of knife can follow the straight edge of a square or a ruler much more accurately than a scalpel and it also gives a much better shoulder line reference point for cutting shoulders of dovetails or tenons. Japanese knives are made quite like a samurai sword from two layers of metal, a hard high carbon steel on the bottom and a softer steel on top. Due to the extreme hardness of the high carbon steel the flat back of the blade is lightly hollow ground (ura) to make sharpening a little easier. 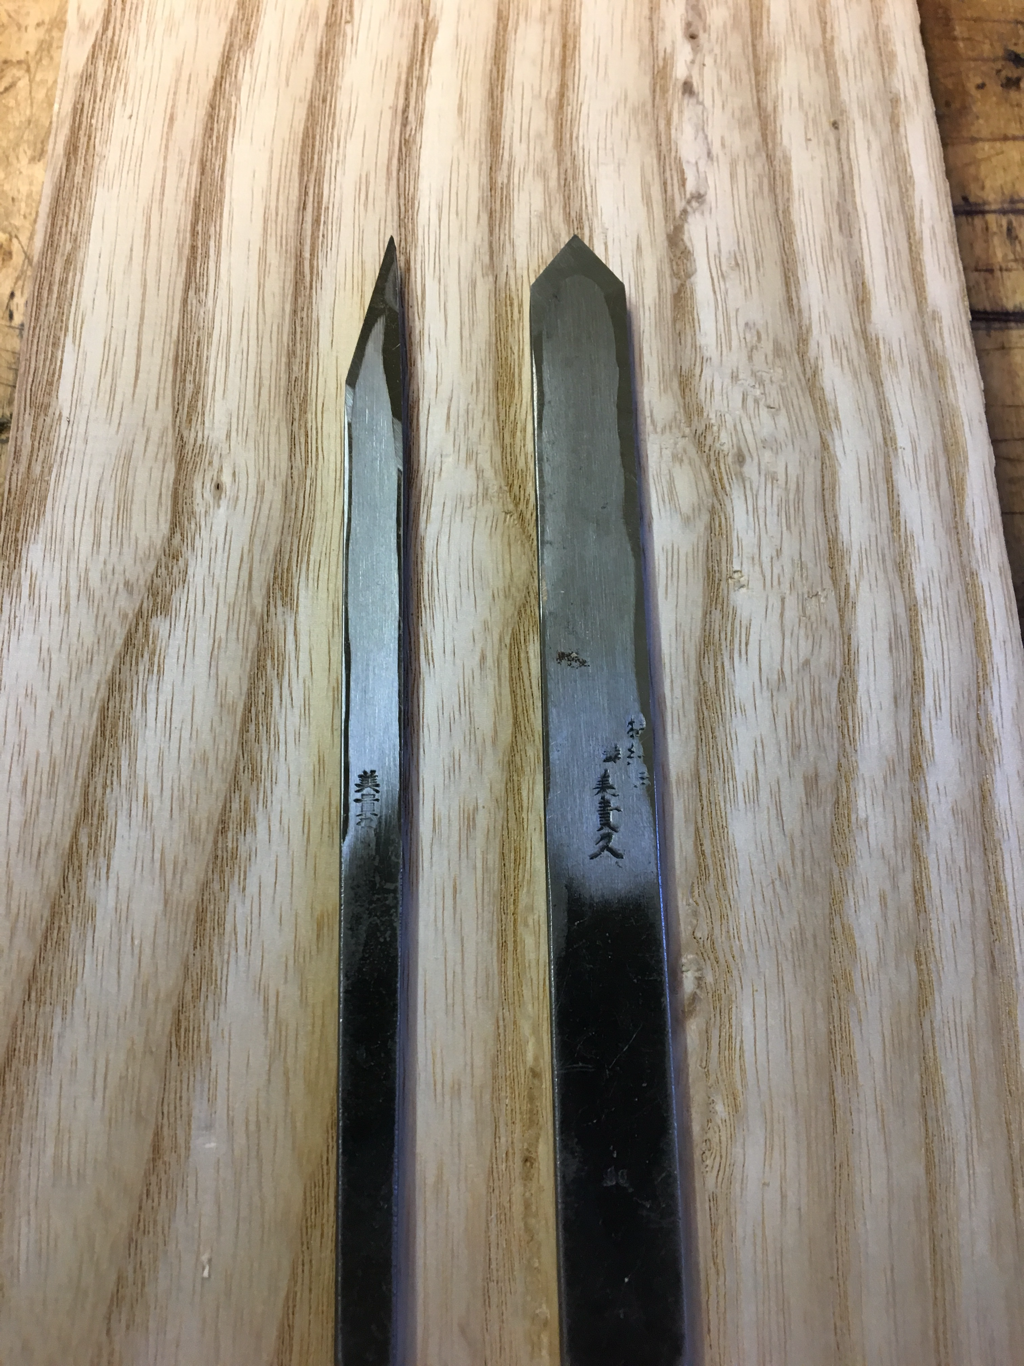 The back sides of the two Japanese knives showing the hollow ground 'ura'. Thats all for April, look out for May's blog post in a few weeks time.
Welcome to the March edition of Tool of the Month! This month I'll take a little look at dowel plates 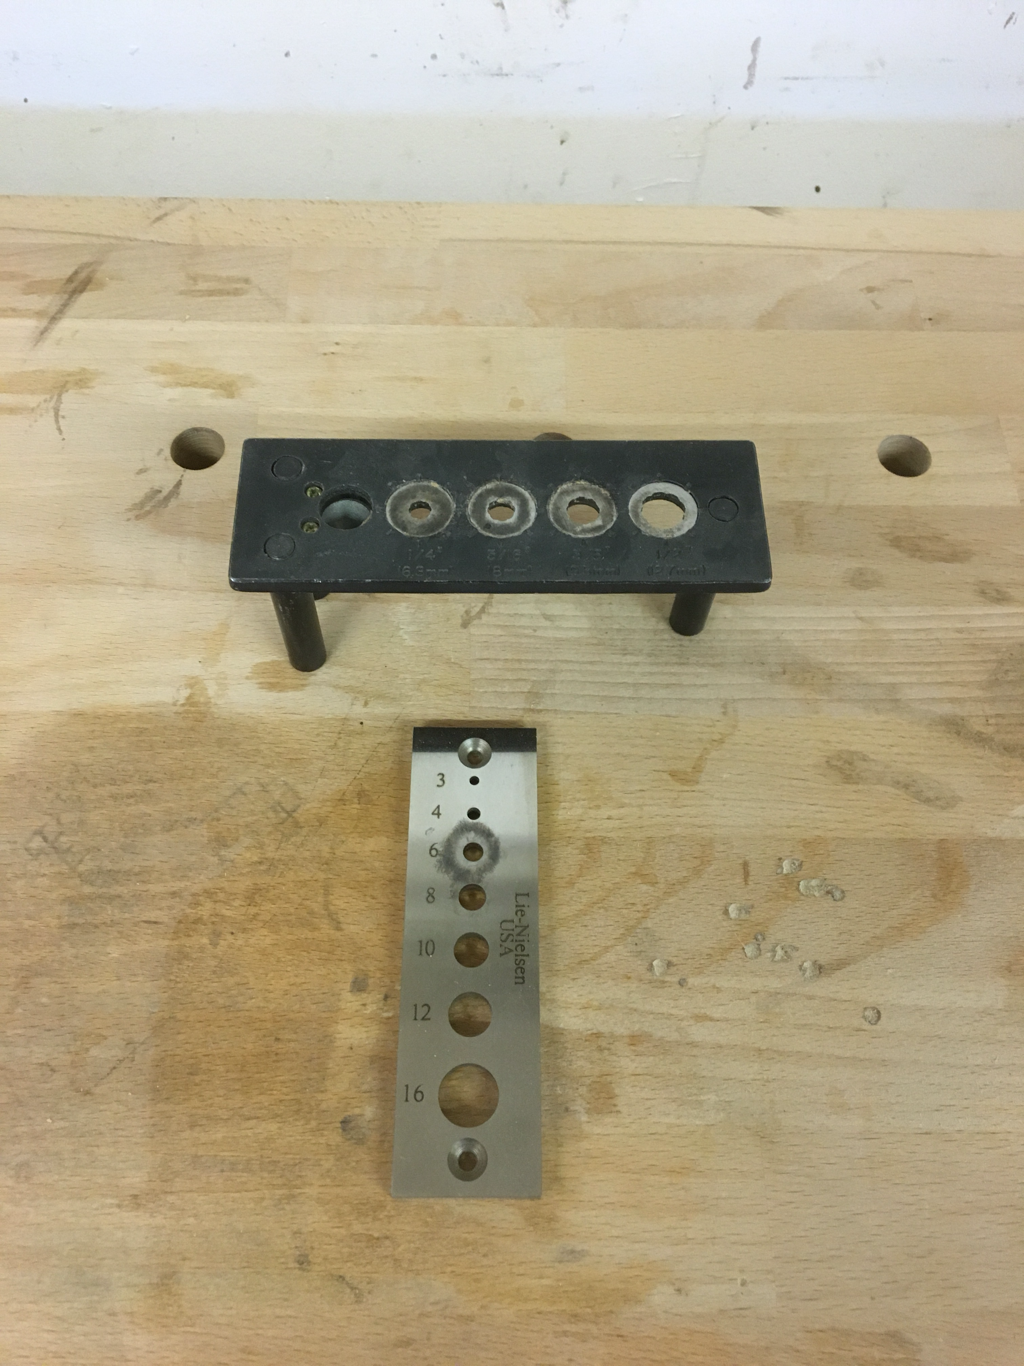 Dowel plates are incredibly low tech and simple, but for making up short pegs or dowels they really can't be beaten for speeed and ease of use! 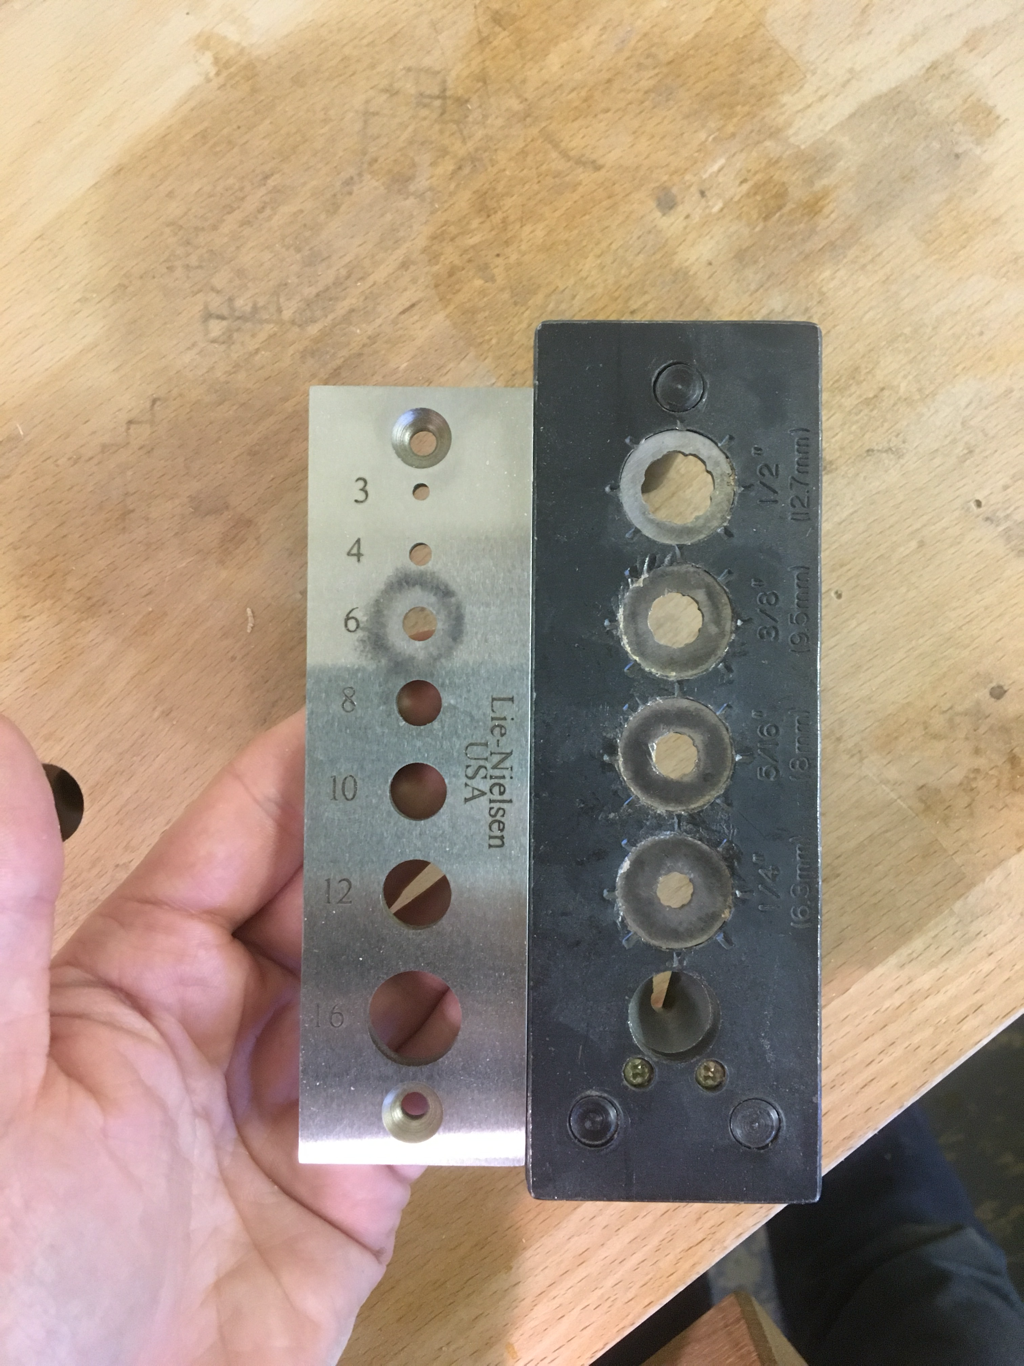 In effect all a dowel plate is, is a piece of metal with different sized holes drilled through it. Some plates use harder steels (Lie Nielsen use A2) and some utilise different shaped holes, you could make your own by drilling holes in a sash clamp! 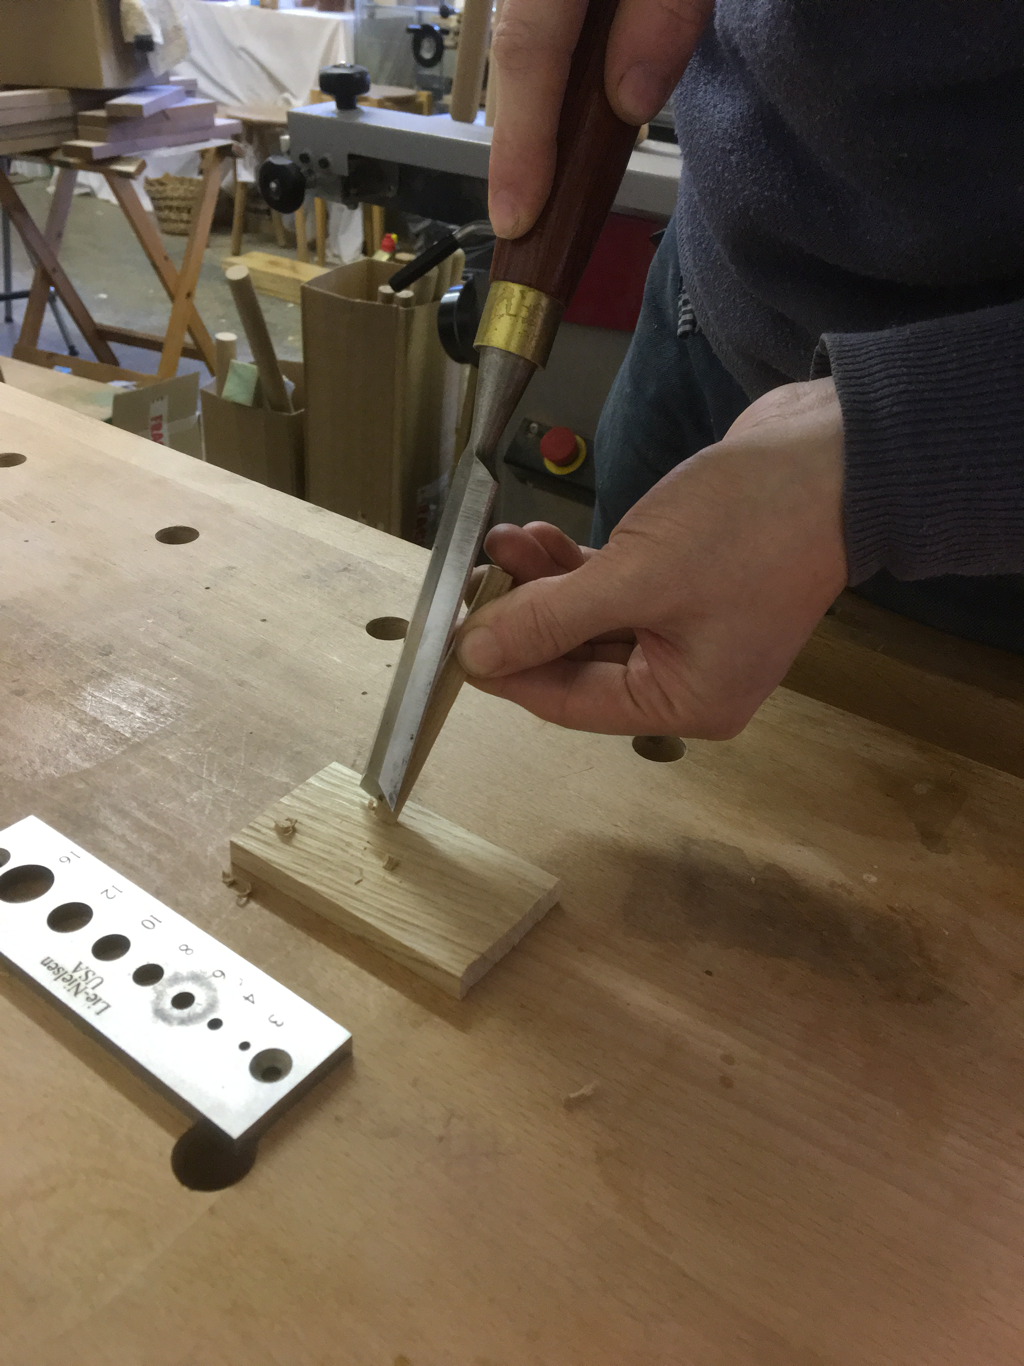 To make a dowel using a dowel plate, first you need to cut or split some suitable timber into short slightly oversized square lengths, then shape a point on one end using a chisel, knife or pencil sharpener... 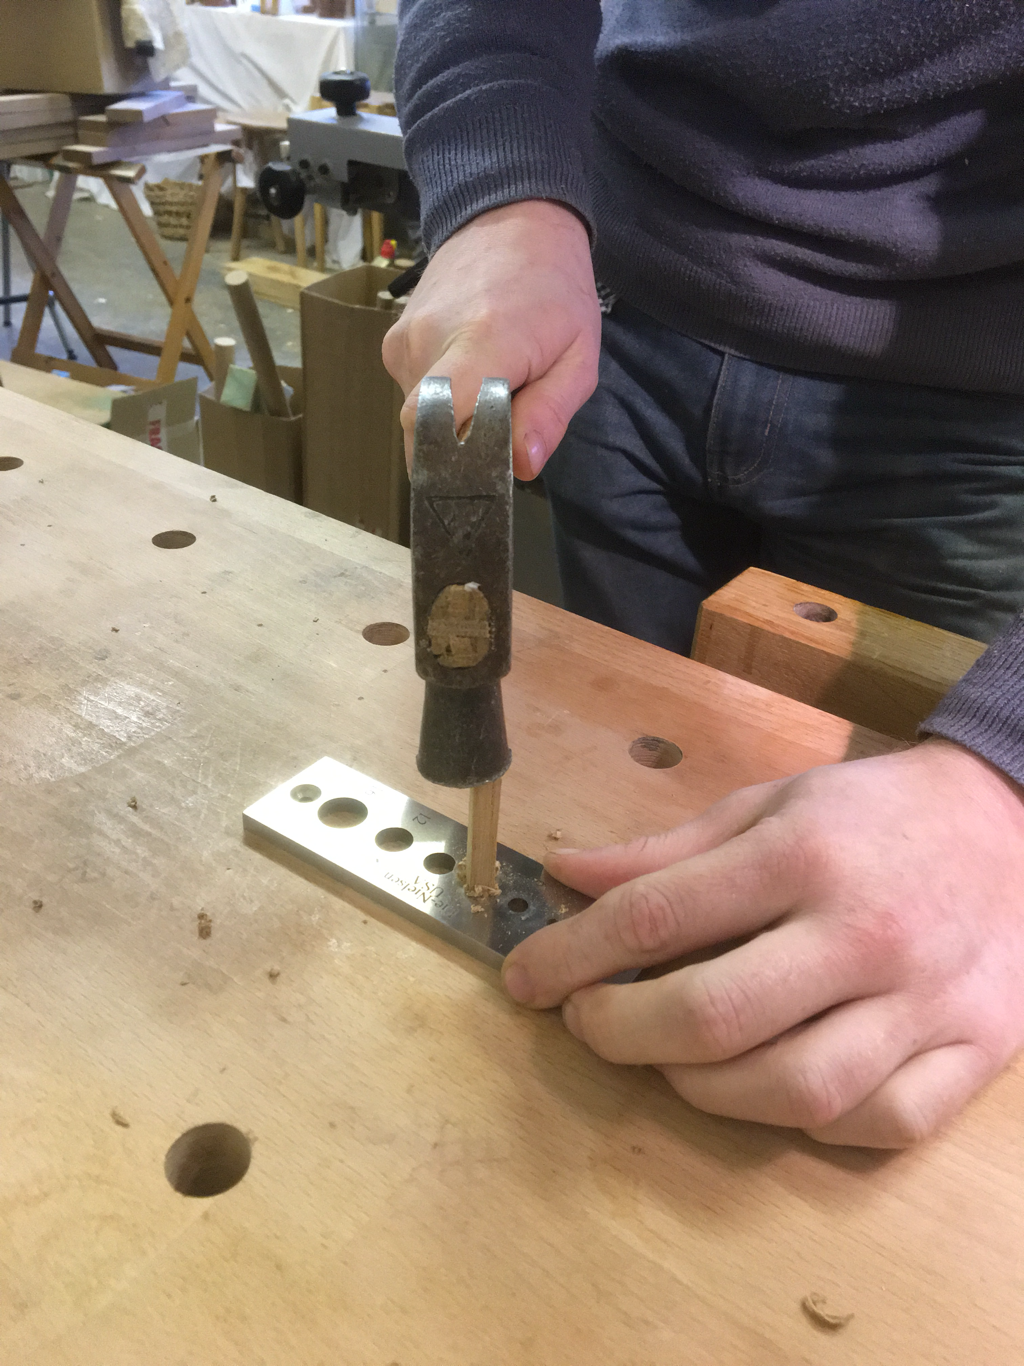 .....then hammer it through the appropriate sized hole.... 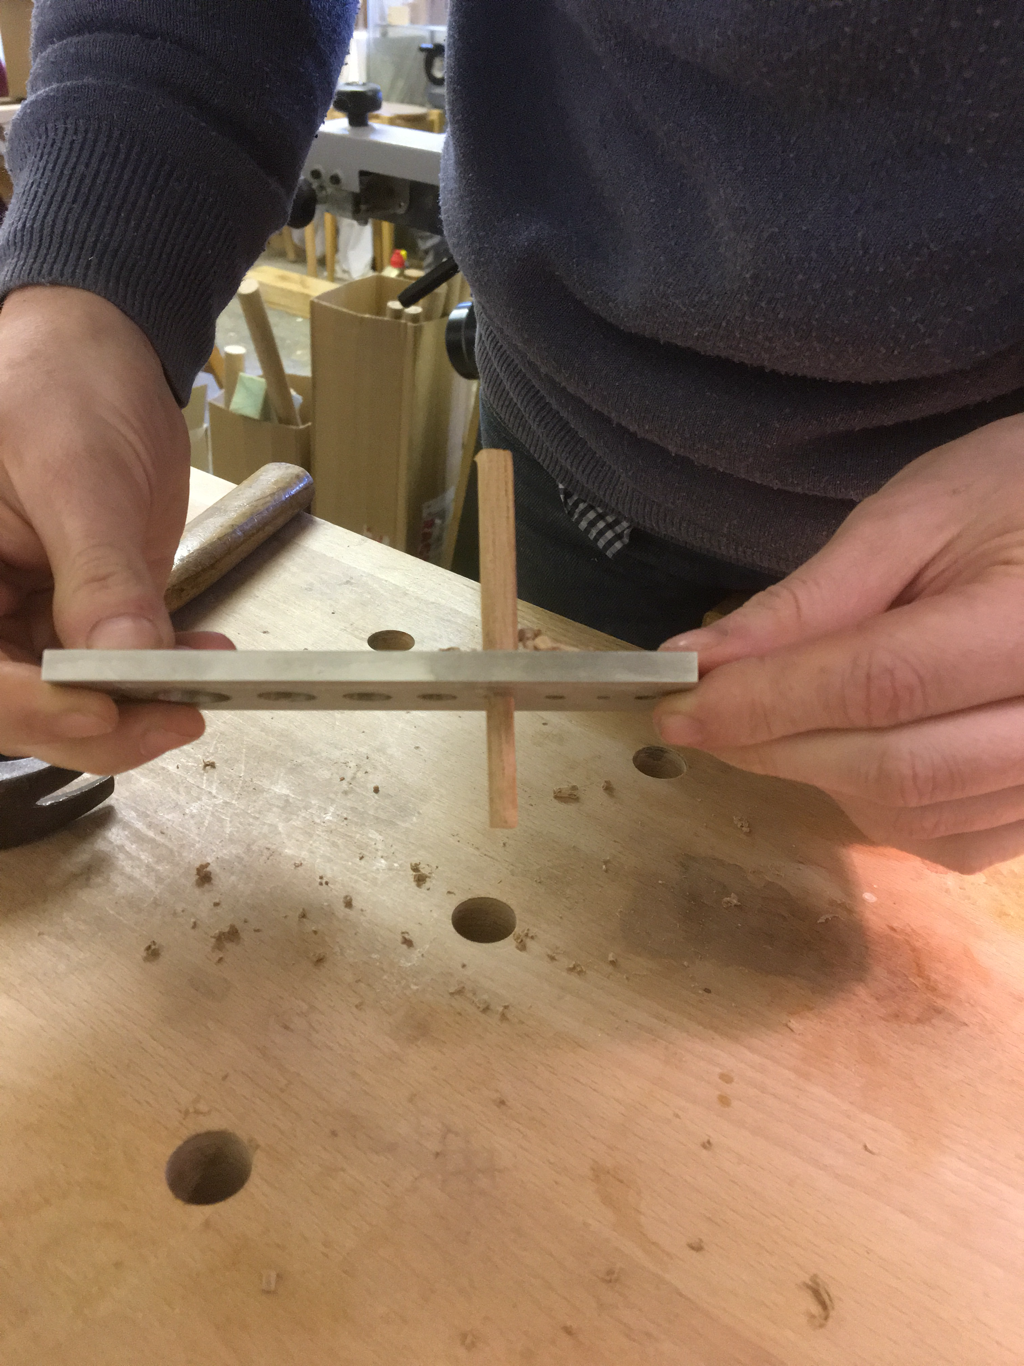 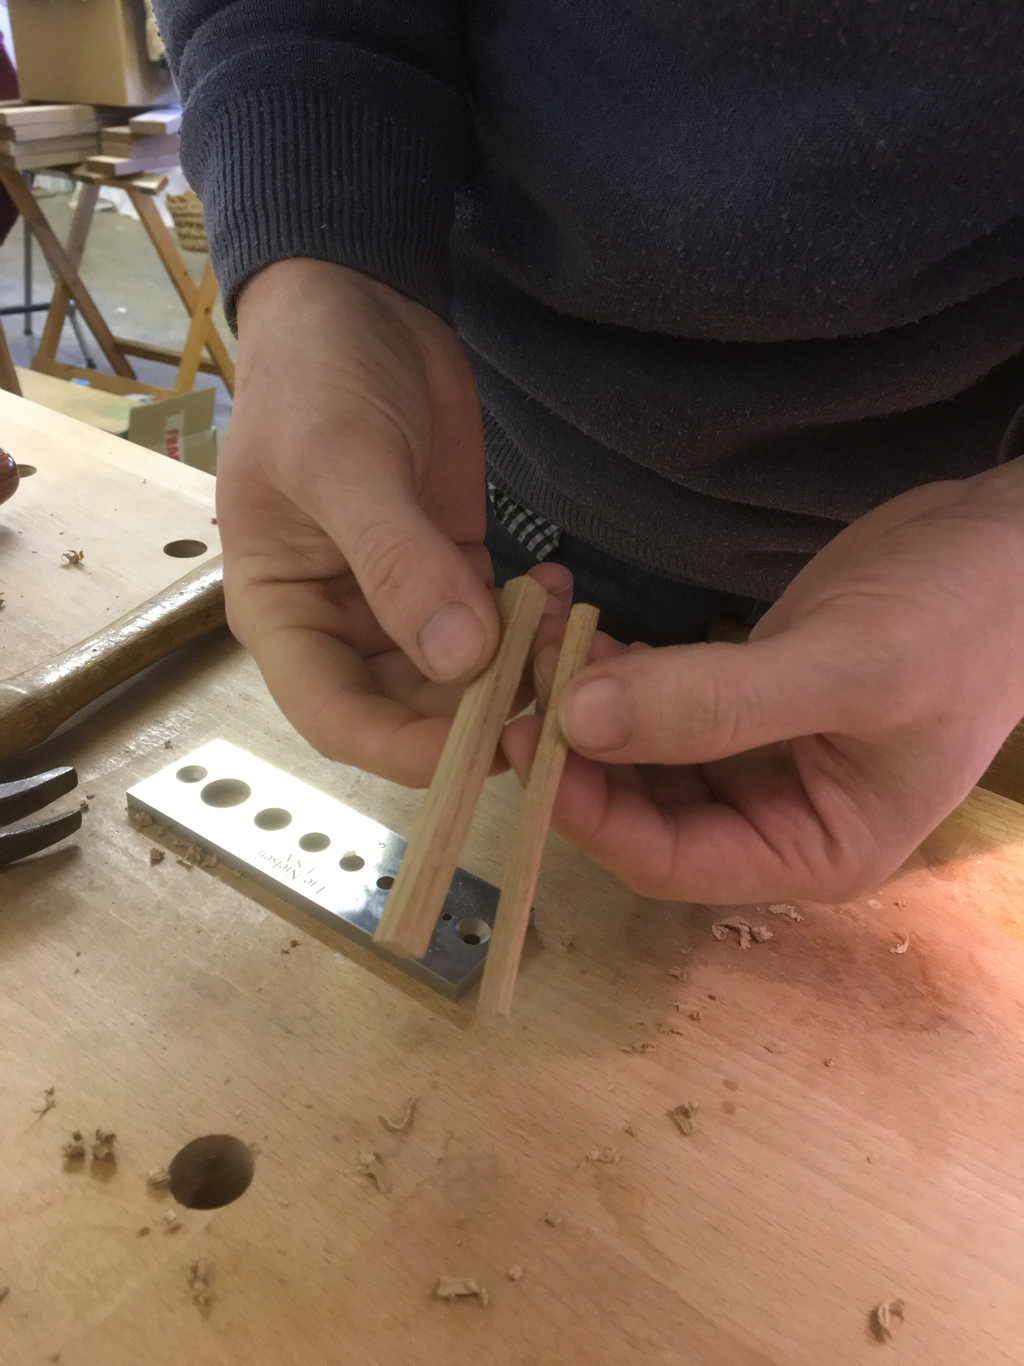 ...simple really!
That's all for March, look out for the next Tool of the Month post in April! |
About
Welcome to my blog! Here you can see what I have been up to in the workshop, gain an insight into my work and some of the many tools I use to make each piece of bespoke furniture. Archives
April 2024
Categories
All
|
 RSS Feed